A kitchen’s exhaust hood is what carries heat, smoke, and grease-laden air out of the space, and sizing its airflow correctly is both a code requirement and a comfort-and-safety issue. Getting the CFM right comes down to a few practical questions: what equipment sits under the hood and how hard it works, what type of hood it is, how much capture area it has, and how the exhaust is balanced with make-up air. This guide walks through each of those, then lays out a simple way to estimate hood CFM for a cook line rather than guessing at it. A hood is also one of the few purchases governed as much by code as by preference, and one that is genuinely hard to change once ducting is run through a building, so getting the airflow right on paper — before anything is fabricated — matters far more here than with equipment you can simply swap out later.
Start with the numbers that matter
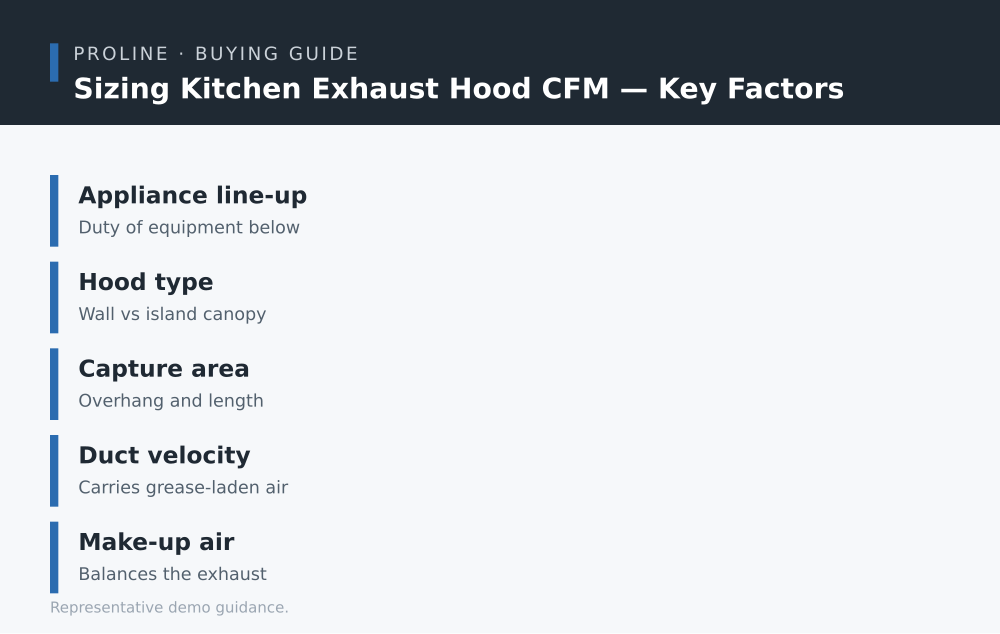
The most important input is the duty of the equipment under the hood — how much heat and grease it produces. Cooking equipment is grouped into duty classes: light-duty appliances like ovens and steamers produce the least effluent, medium-duty ranges and fryers more, heavy-duty charbroilers a great deal, and extra-heavy solid-fuel equipment the most of all. That class drives the airflow the hood must pull per foot of length. The second input is the hood’s length and overhang — a canopy needs to extend beyond the cooking surface to capture rising effluent, so a longer, well-overhung hood captures more reliably. The third consideration is duct velocity: the exhaust duct must move fast enough to carry grease-laden air rather than letting it settle and build up. Getting the duty class, hood length, and overhang right up front is most of the calculation, and far cheaper than discovering a hood cannot keep the line clear once the equipment is running hot.
Match it to your kitchen
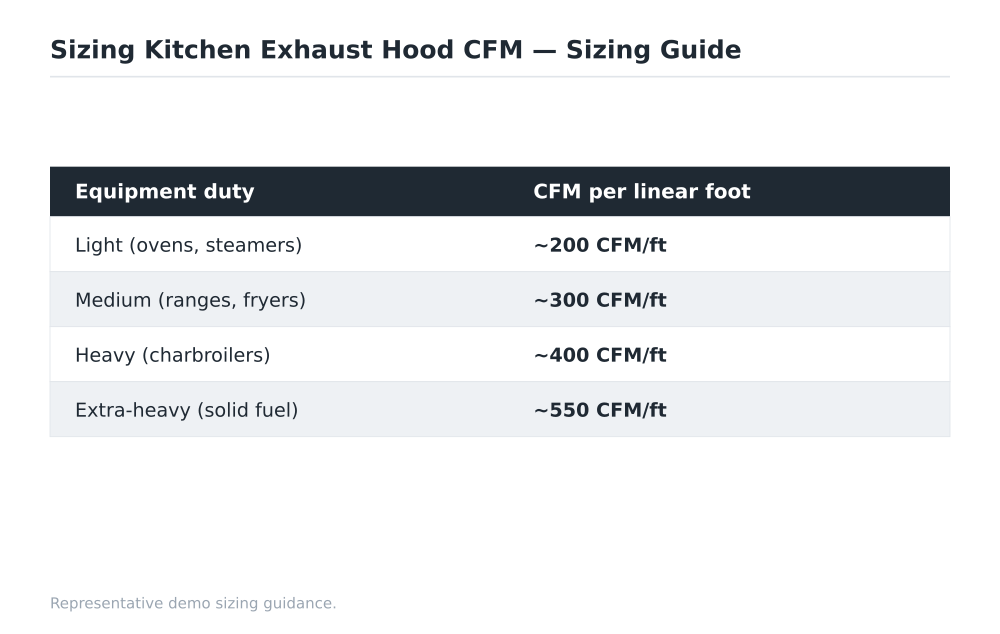
Once you know the duty class of the equipment, you can translate it into airflow. A common rule of thumb sizes a wall-mounted canopy at roughly 200 CFM per linear foot for light-duty lines, around 300 for medium-duty ranges and fryers, about 400 for heavy-duty charbroilers, and higher still for extra-heavy solid-fuel cooking. Multiply the CFM-per-foot figure for your heaviest equipment class by the hood’s length to get a working exhaust target. The table above lists those rates as a starting point — actual requirements depend on your equipment line-up, hood style, and local code, and the authority having jurisdiction has the final say. The key idea is that a line dominated by a charbroiler needs far more airflow per foot than one of ovens, so size to the hardest-working equipment under the hood rather than to an average of everything on the line.
Weigh the main trade-off
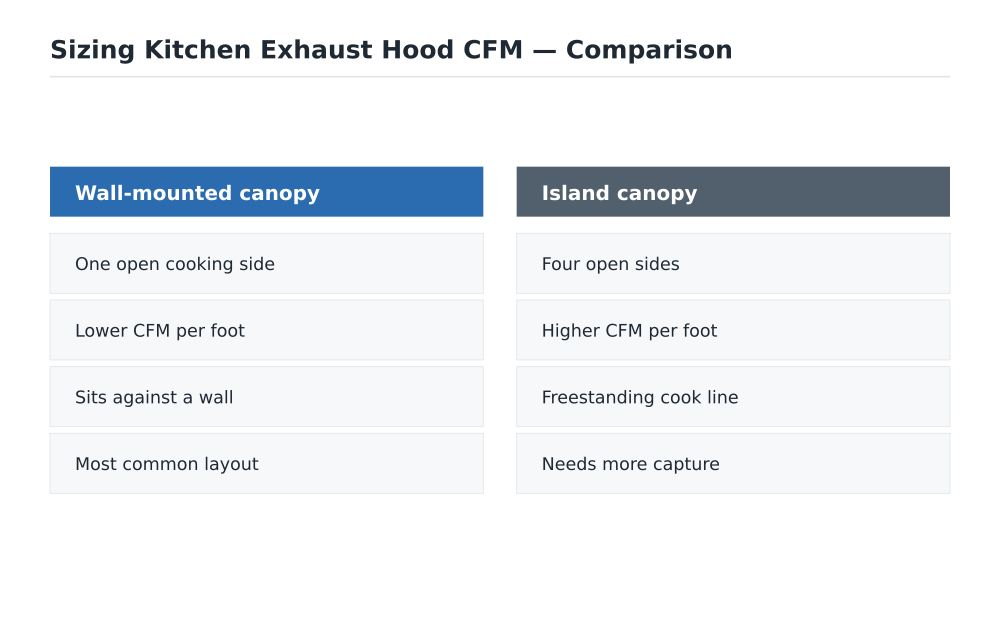
Hood type is the main structural either-or. A wall-mounted canopy sits against a wall with the cooking line beneath it and only one open cooking side, which makes capture efficient and keeps the required CFM per foot lower — it is the most common layout. An island canopy hangs over a freestanding cook line open on all four sides, which looks striking and suits an open kitchen but is far harder to capture from, so it needs meaningfully higher airflow per foot to do the same job. The trade-off is between the flexibility and sightlines of an island line and the lower airflow, and often lower cost, of a wall-mounted hood. Neither is universally better; the right choice follows from your kitchen layout and how much capture the design gives up. The comparison above summarizes where each tends to land so you can weigh airflow against layout.
Plan installation and utilities
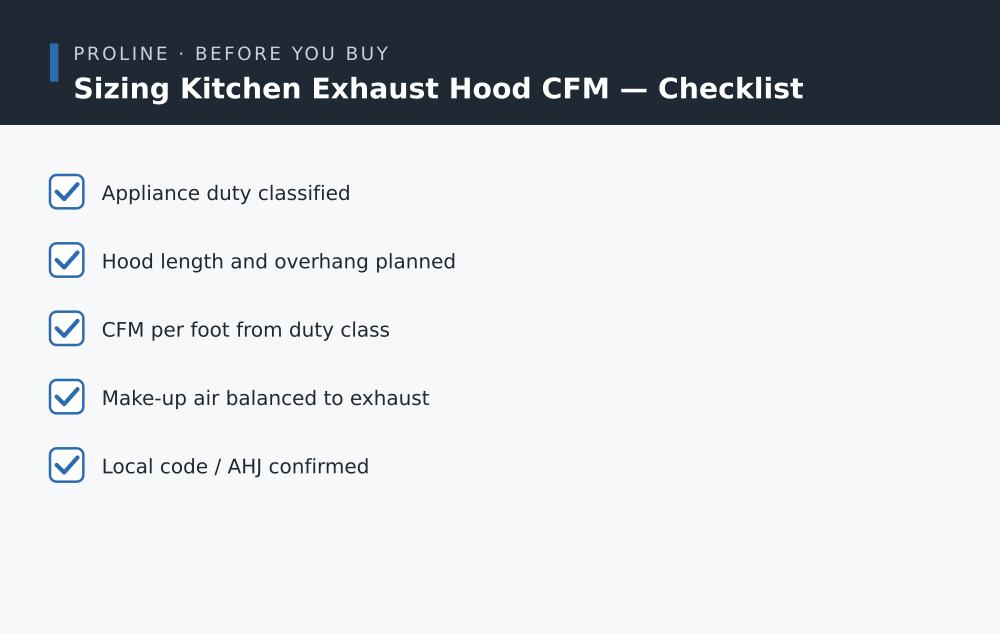
A hood is only half of a ventilation system — the other half is make-up air, and planning both together is essential. Whatever volume the hood exhausts must be replaced by conditioned make-up air, or the kitchen goes into negative pressure that slams doors, backdrafts appliances, and pulls the hood’s capture down. Balance the make-up air to the exhaust from the start rather than adding it as an afterthought. Classify each appliance’s duty honestly, plan the hood’s length and overhang around the actual cooking surface, and confirm the whole design with the local authority having jurisdiction, since mechanical and fire codes govern commercial hoods closely. Building in a cleaning and inspection schedule from day one keeps grease from accumulating in the hood and duct, which is both a performance and a fire-safety matter. The checklist above captures the items worth confirming before a hood is fabricated and installed.
How to decide
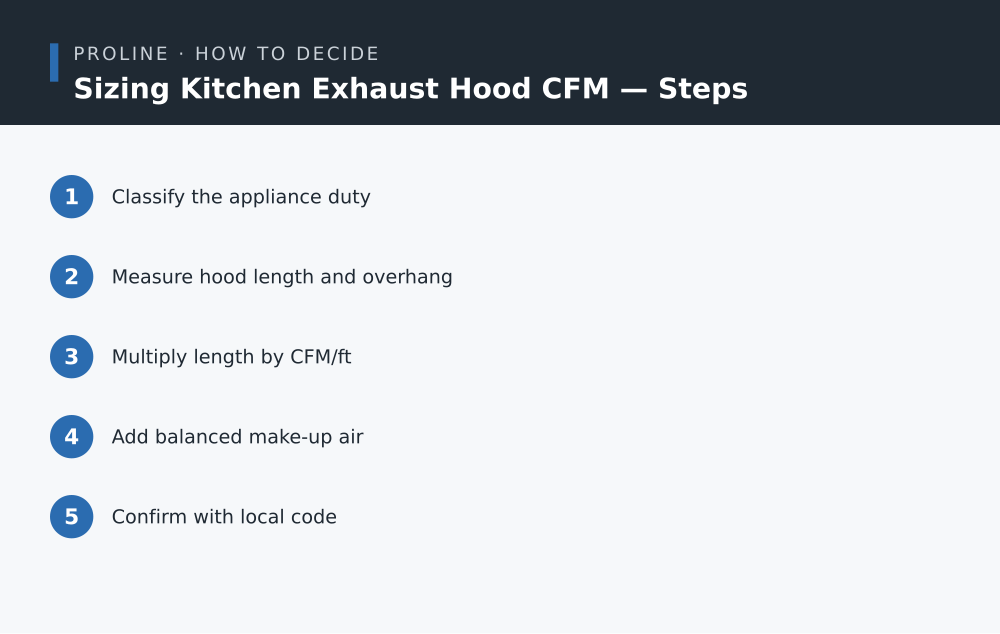
Putting it together, a simple sequence keeps the estimate grounded. First, classify the duty of the equipment that will sit under the hood, focusing on the hardest-working appliance. Second, measure the hood length you need, including overhang beyond the cooking surface. Third, multiply that length by the CFM-per-foot figure for the duty class to get a working exhaust target. Fourth, plan balanced make-up air equal to the exhaust so the kitchen stays neutral. Fifth, confirm the whole design with the local authority having jurisdiction before fabrication. Work through those five steps and you will have a grounded CFM estimate to take to a mechanical designer, rather than a guess — which is the difference between a line that stays clear and comfortable and one that fills with heat and smoke every service.
Common mistakes to avoid
A few mistakes come up again and again. The first is sizing airflow to an average of the equipment rather than to the hardest-working appliance under the hood: a line with a charbroiler needs far more capture than its ovens alone would suggest. The second is forgetting make-up air entirely, so the hood throws the kitchen into negative pressure that backdrafts appliances and pulls capture down — exhaust and make-up must be balanced from the start. The third is skimping on hood length or overhang, so effluent escapes the edges of a canopy that does not extend past the cooking surface. The fourth is treating the local authority having jurisdiction as a formality; mechanical and fire codes govern hoods closely, and a design that ignores them gets rebuilt at real cost. The fifth is deferring the cleaning and inspection schedule, letting grease accumulate in the hood and duct until it becomes both a performance and a fire-safety problem. None of these are exotic; they are the predictable result of guessing at airflow rather than working from the equipment’s real duty and the code that governs it.
Related equipment
Exhaust hoods are specified around the cooking equipment beneath them; these category pages cover the equipment that most often drives hood sizing:
- Commercial Cooking Ranges
- Commercial Deep Fryers
Sizing a hood well is mostly a matter of classifying your equipment’s duty honestly, translating it into CFM per foot of hood, and balancing make-up air before anything is fabricated. Get those right and the rest — hood type, duct velocity, cleaning schedule — falls into place around them. Use the sizing and checklist above as a starting point, and confirm the final design with your local authority. A short conversation with a ventilation contractor about your equipment line-up is time well spent before anything is fabricated.